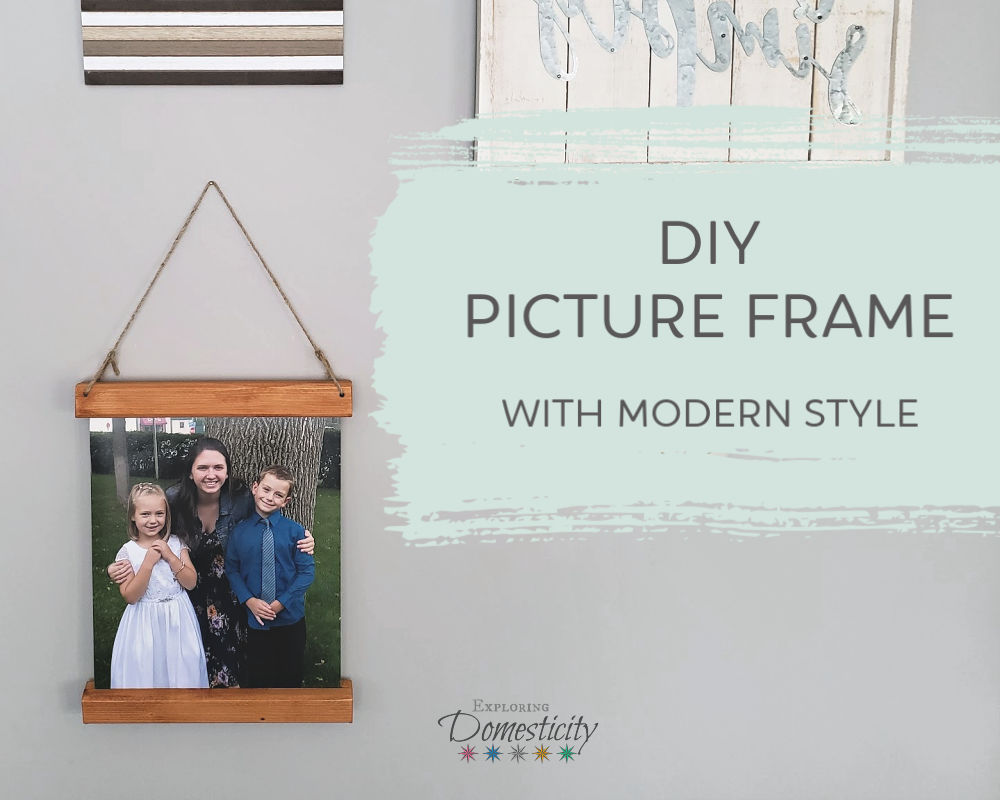
Beautifully display any favorite photo with this easy picture frame DIY. This process is very forgiving, works for any size, and looks gorgeous.
You don’t have to be a master woodworker, for this easy DIY. Simple sandwiching of the top and bottom of the photo make for this gorgeous statement on your wall and beautiful display of precious memories!
This is a sponsored post in partnership with UrbanFarmhouseTampa. We also participate in affiliate programs, including the Amazon Services LLC Associates Program, an affiliate advertising program designed to provide a means for us to earn fees by linking to Amazon.com and affiliated sites. If you don’t have Prime, you can try it 30 days for free here!
More than an easy picture frame DIY
Having this photo on our wall has been a long time coming. It’s more than just a pretty picture and a easy picture frame DIY. This is about the photo and who is in it.
Many of you can probably relate to being a step-parent, having a step-parent, or having some sort of “non-traditional” family situation.
As a step-mom, you kind of just create your own family and can feel a bit like an outsider with your step-child. It doesn’t come naturally with everyone. Especially if there are moments of tension with the other parent.
In general, I’m terrible about printing photos. We just don’t have a lot of pictures of the kids on the wall. Most importantly, we don’t have any photos of all three children displayed on the wall.
When we snapped this gorgeous photo at a wedding, I knew we had to do something with it!
Easy DIY Picture Frame
Most of the picture frames in our house are made by my dad. He makes it look so easy! However, this time around, I had an even easier idea in mind.
Instead of having to measure all four sides, miter corners, and get everything just right, this method is SO much simpler!
Even those of us who aren’t master woodworkers can do it!
I remembered when he hung a quilt by sandwiching the top between two pieces of wood and secured it together. Exactly the simple look I was going with! Add matching wood to the bottom to weigh it down and a piece of twine to hang, and that’s all there is to it!
Can I just buy one?
If you LOVE the look, but you’re wondering if you can just buy something like this – you can! I found quite a few options on Amazon.
Some of these will get you close to the right look, but it’s just not the same… They have different sizing options, so you can find one to match your photo. However, I love the thick wood and twine look myself!
Also, I’m telling you, you can make this yourself! It’s so easy!
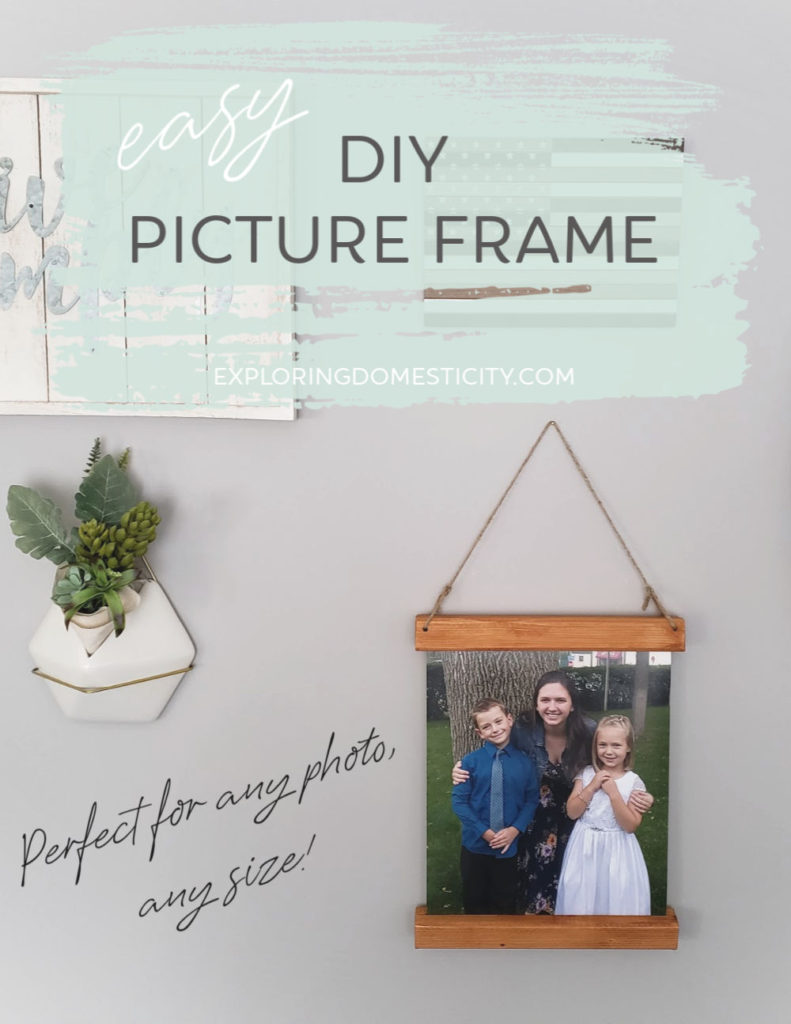
Perfect for any size photo
No matter what size photo you go with, this type of easy DIY picture frame will work.
In our case, the photos I had printed from Walmart were 11 x 14 and only about $11. I didn’t know where we’d display one much bigger. However, I would love to see it as a 16 x 20, which are on sale as of writing this for under $10!
The important part is not the exact size of your boards, but how they look and that the amount of overhang on each side is appealing.
Sizing your DIY photo frame
The wood used in this project is just a piece of 1 x 2.
We chose our measurement based on the fact that we could get 8 pieces (for our two photos) out of one board. So, eight – 1 foot pieces.
You only need pieces for the top and bottom, so there is no measuring for the sides. Just two identical boards for the top and two identical boards for the bottom is all you need to cut.
Easily creating your DIY photo frame
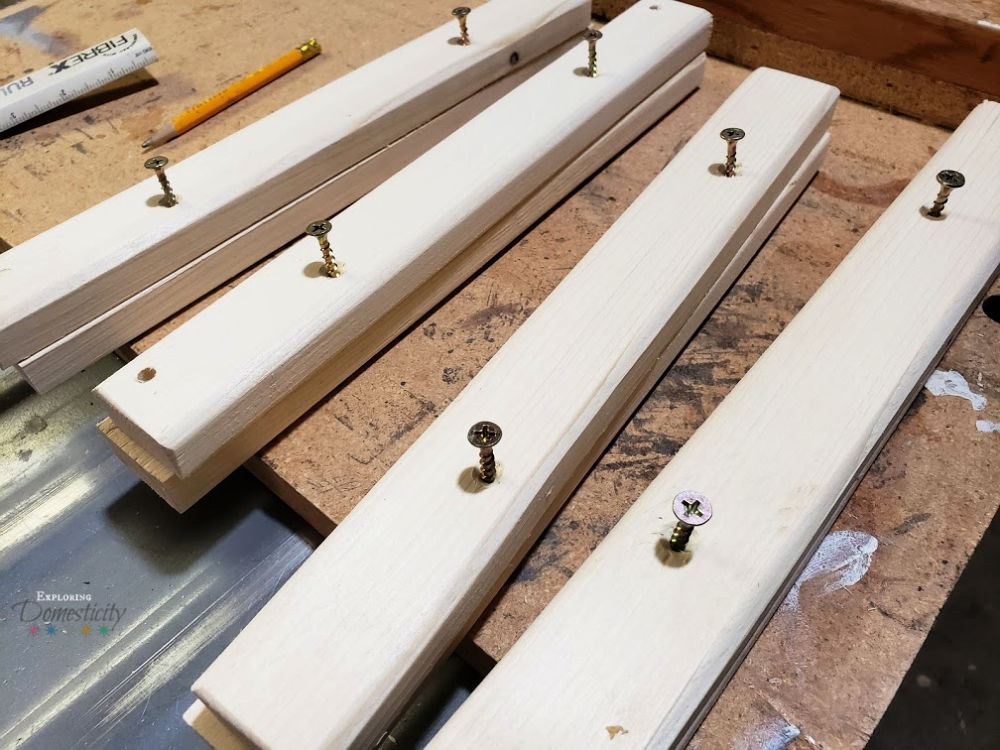
Once you have four pieces cut, pick your two favorites for the front of the frame. If you have some boards that just aren’t as pretty or have some type of flaw, you can designate those to the back.
Mark the pieces on the back with something like, “top/front” “top/back “bottom/front” and “bottom/back.” You will need to drill holes in both to secure together and extra holes through the top pieces for the twine. So, this will help keep everything organized.
Sandwich the two top or bottom pieces just as you want them to appear. From the back, pre-drill two holes about two inches in from the outer edges. You want it to go completely through the back piece and only slightly into the front piece. This will secure your pieces together and hold your photo in place.
It also helps to drill a wider hole into the back just enough to be able to counter-sink your screws. It will help from scratching your walls.
Repeat with the bottom pieces.
Again, with the top pieces of wood sandwiched together as you want them to appear, locate where you would like your twine to tie. Our holes are located about a half inch from the edges. Drill two holes completely through both pieces of wood.
Also Read: Upcycled lamp with wire basket shade
Finishing touches
If you like a nice, rustic look – and depending on the material you chose – you’re done! It will look fantastic as is.
For us, the board we used had rounded edges on one side, so we sanded the other ends to round them out a little as well and gave it a light sanding all over to smooth them out.
We then stained all the pieces to finish them off. The stain on our frames is a maple.
Easy assembly of our DIY picture frames
Once all that work is done, putting them together is a breeze!
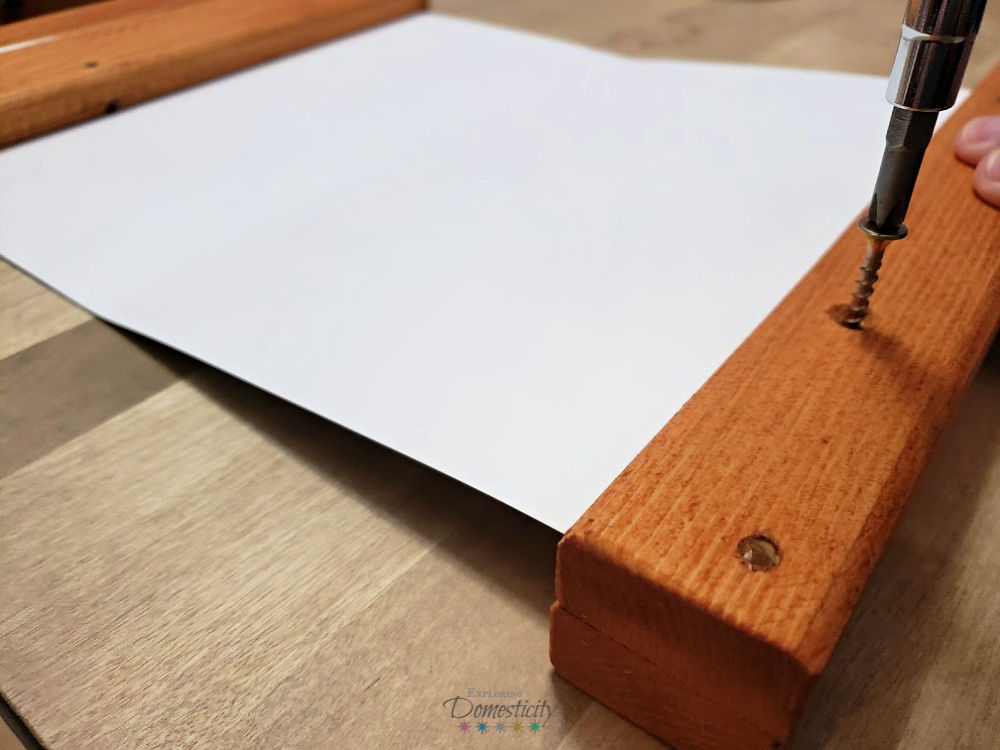
Since you already marked your pieces, it all comes together pretty easily. It helps to have two hands for this, though. Especially if your print was rolled tight for a while like mine.
Place one of the front pieces face-down and position your print in the center of the backside. If you make sure it covers your pre-drilled holes it will hold securely once you drill the back piece in place. Repeat these for the other pieces.
Then, all you have to do is cut a piece of twine and run it through the holes. We find it easier to tightly tape a twist tie to the end of the twine to feed it through. We go in through the back and out through the front so, once it’s tied, the end of the twine is toward the back.
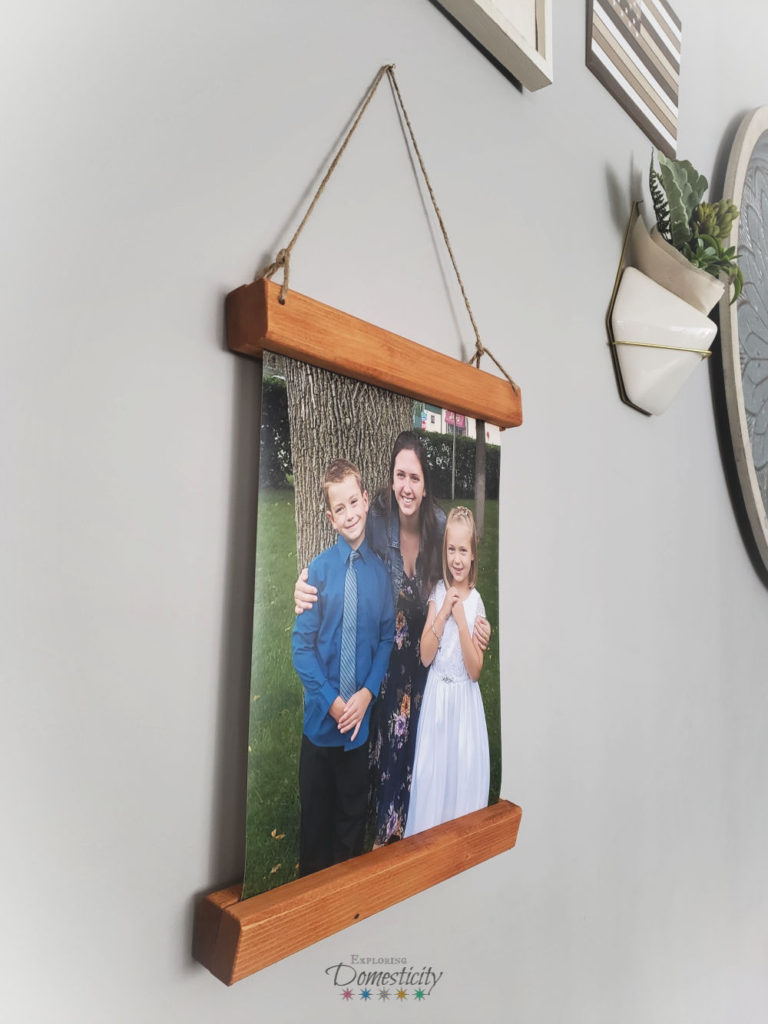
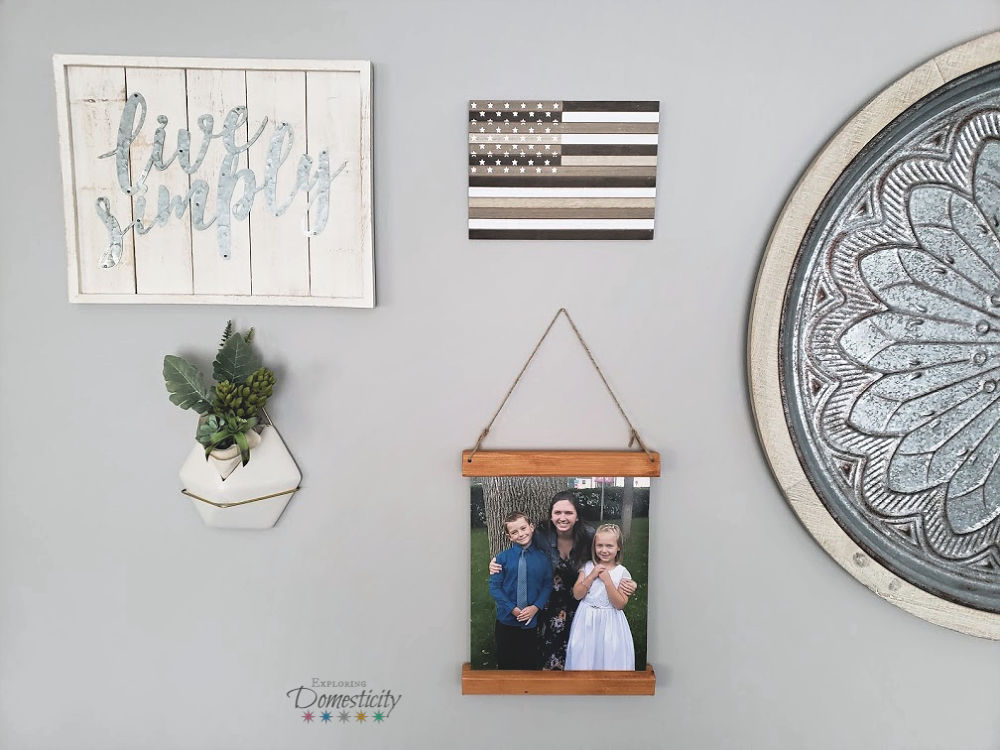
Now just to figure out where to hang it!
I have two spots in mind and I’m torn. One is in the living room. However, we have more whites and grays in there than wood tones. There is one photo of the younger kids in the corner and I think it would be nice next to that. Right over our brand-new blanket ladder that is just a re-purposed pot rack!
The other spot that looks great is in our front living room. It used to be the bunny’s room but now we have the new Xbox in there. So, it has become a pretty popular space. It also has more wood and it seems to fit in better.
I don’t know! At least we have options.
If you’re wondering why we made two, the other is a gift for my mother-in-law. So these are a fantastic – and inexpensive – gift. Perfect for grandparents!
Let me know? Are you making one?
Tell me all about the photo you’re making it for!


Hi Kristin!
I agree with you that the sandwiching method is easier than measuring and cutting 4 sides. Great little DYI project.
Cheers!
Jack
Thank you so much, Jack! I really appreciate that!