
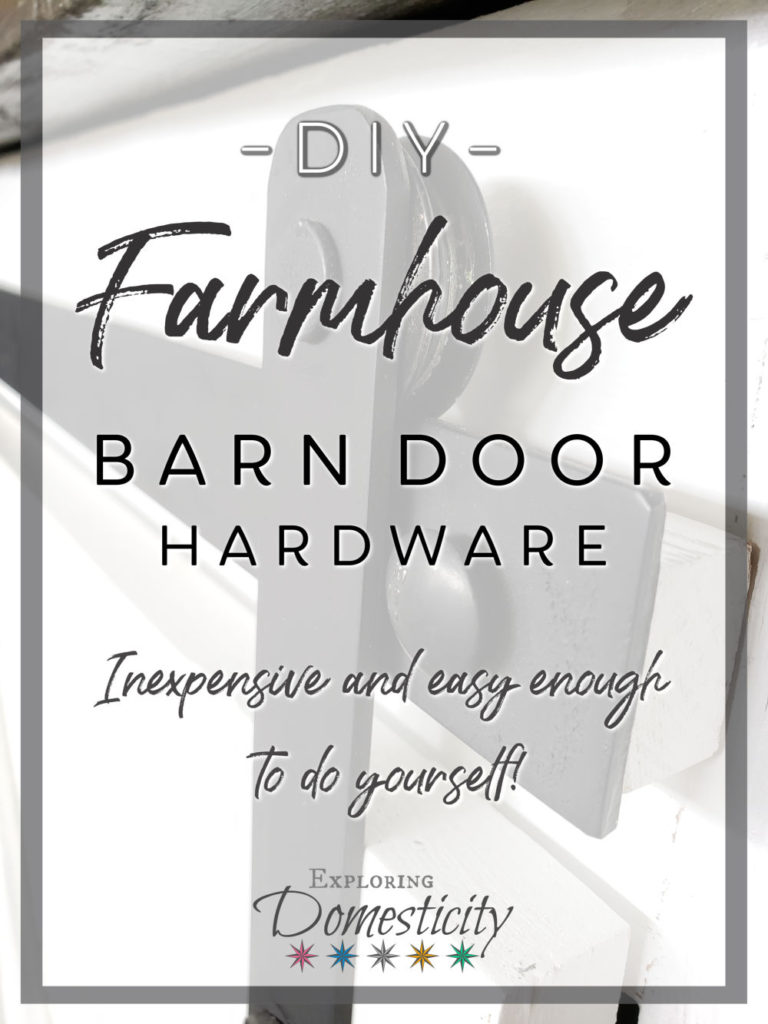
Barn doors are so popular right now. You can find hardware at the store, but they are charging a ton for it! It’s easier (and less expensive) than you think to make your own with this Barn Door Hardware DIY.
You don’t have to pay hundreds for the perfect barn door hardware. With this simple step-by-step and items you can find at your local hardware store, you can make it yourself for less!
This is a sponsored post in partnership with UrbanFarmhouseTampa. We also participate in affiliate programs, including the Amazon Services LLC Associates Program, an affiliate advertising program designed to provide a means for us to earn fees by linking to Amazon.com and affiliated sites. If you don’t have Prime, you can try it 30 days for free here!
I love the barn door, farmhouse look. A lot of that style has worked it’s way into our house over the years.
In fact, this past Christmas we got the best surprise!
In typical mom fashion, our bedroom has been the last room to finish in our house. We remodeled and moved in a year and a half ago. The kids rooms were finished right away and the common areas were right behind them. Only our bedroom was left with our previous DIY night stands and a random cheap IKEA dresser.
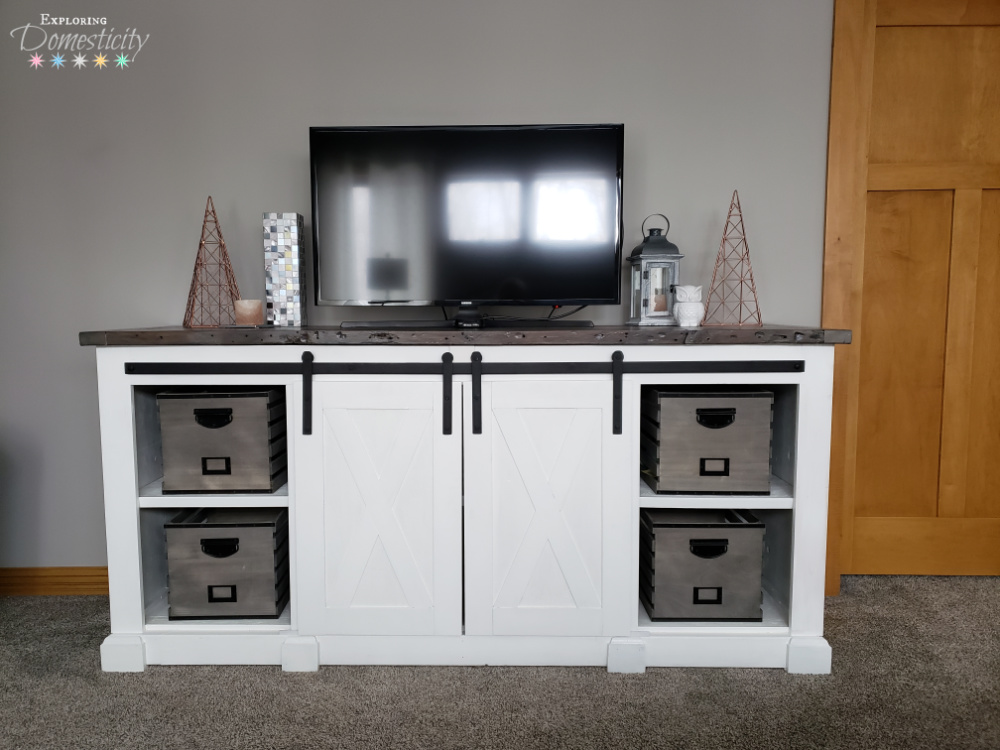
Just when we though all the gifts had been opened on Christmas Eve, my parents told us to go outside. There we found the most amazing dresser with a gorgeous distressed top and sliding barn doors!
DIY Farmhouse Furniture
My dad is a pretty amazing wood worker and has made many things in our home (like these farmhouse tables, this shiplap fireplace wall, and our amazing mudroom cubbies – just to name a few…). However, he claims just about anyone can do this barn door hardware DIY.
He explained the process to me, and it seems much easier than people think. It’s simple enough that I can share this barn door hardware DIY with you!
Barn Door Hardware and the price – yikes!
Barn doors are so popular now that you can find the hardware at nearly every hardware store and online. However, the price has gotten pretty high! With a project like this, there are two doors, so you even need to double that to buy to sets. You can find kits like this one for double doors, but look at that price!
A lot of the barn door hardware available is designed for full-size doors, which can be heavy and need to support the weight. For this project, the dresser doors are small and don’t have that much weight to them.
Barn Door Hardware DIY
What you need
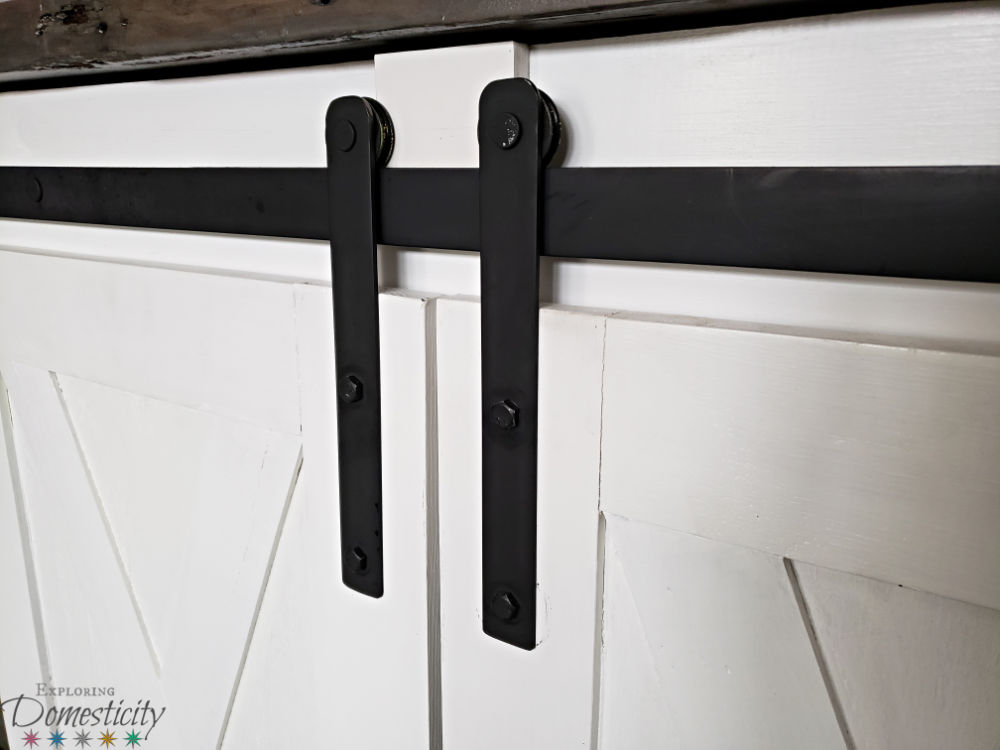
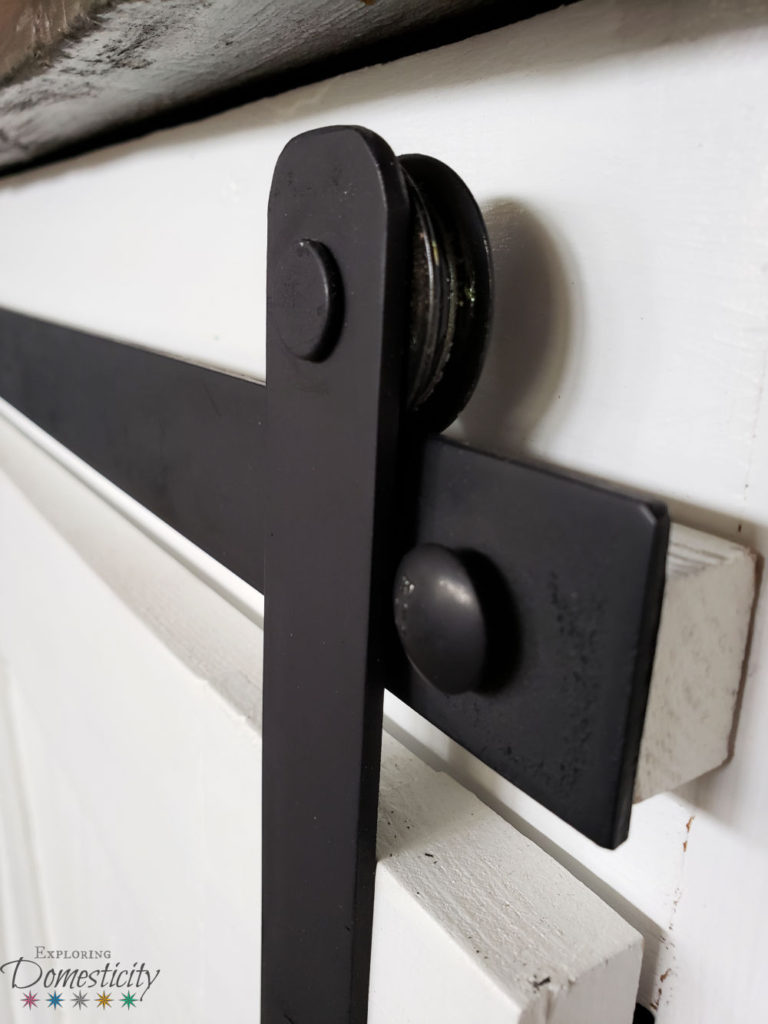
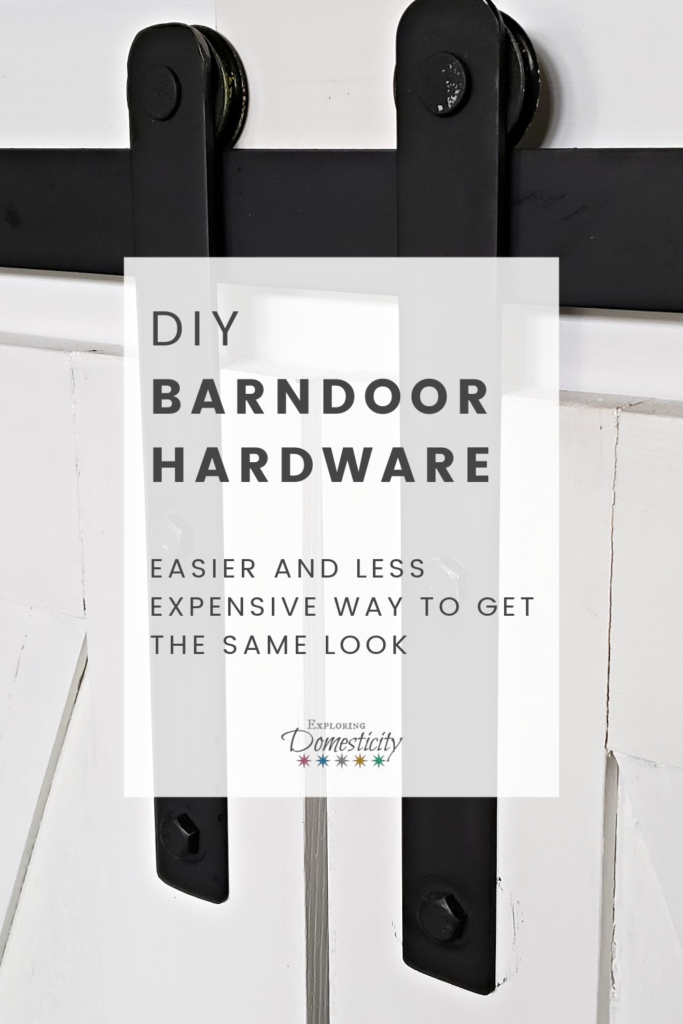
To make the barn doors on our farmhouse dresser, it takes two pieces of iron. The main piece of iron for the glide is 1.5″ x 6′ and the smaller piece used to attach the rollers to the door is 1″ x 4′ and cut into four equal 1 foot pieces. The rollers used are actually very inexpensive sliding door rollers from Menards, painted black.
Barn Door Hardware DIY Materials
- One larger pieces of 1.5″ iron for the rail (for our project it was 6 feet long)
- One piece of 1″ x 4′ iron, cut into four equal pieces
- One set of replacement patio door rollers
- Bolts
- 2 small sections (about 3-4″) of angle iron
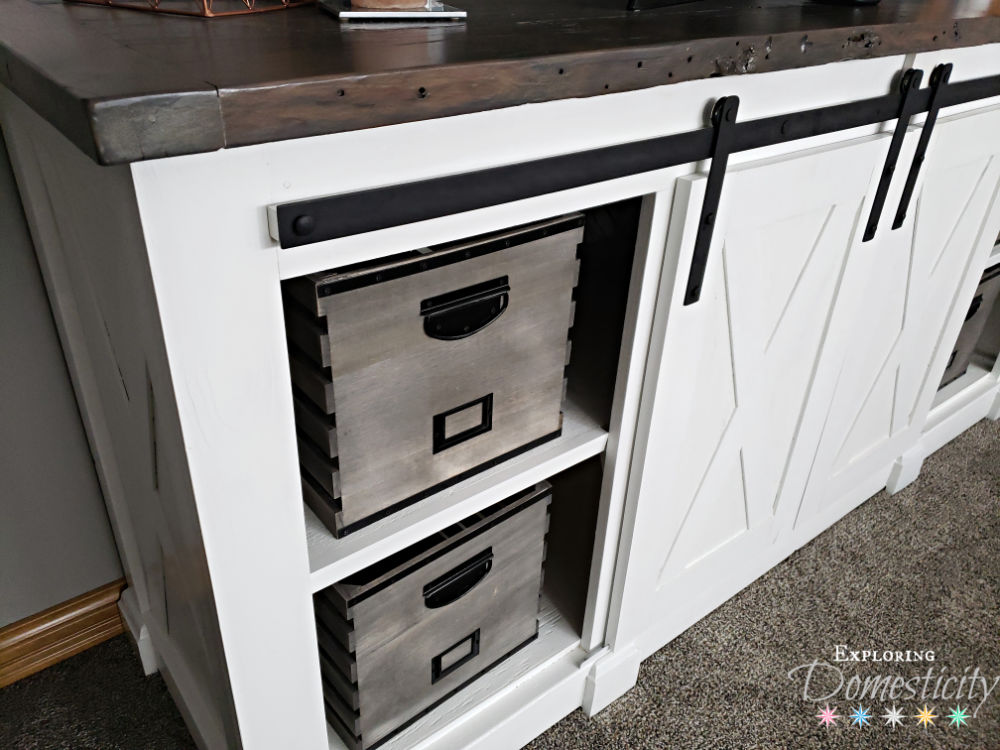
Attaching all the metal
The four small pieces of iron are attached vertically to the front of the doors with two bolts that are counter sunk on the back so that they don’t stick out and disrupt the movement. I believe the hardware needed to attach the rollers to the top of the iron is usually included when you buy them. Depending on the materials you use, you may need to apply black paint to the bolts and rollers to complete the look.
Hanging and guiding the doors
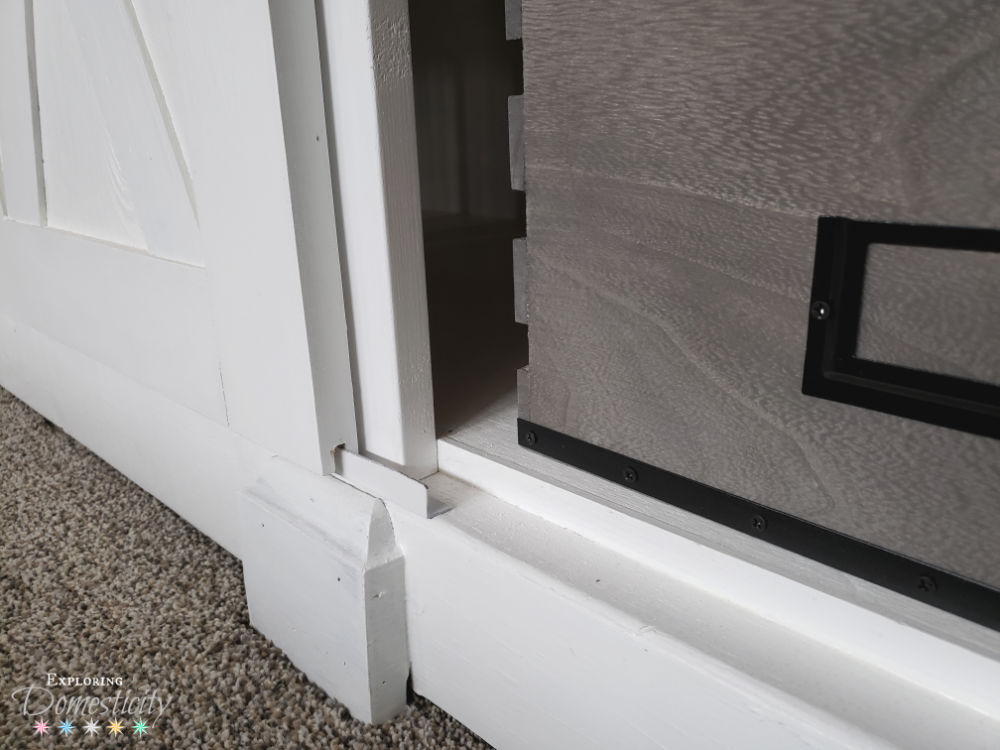
The doors then hang on the larger piece of iron by the rollers. To keep the doors from flapping out out and coming off the track, it helps to cut a groove in the bottom of each door and attach a piece of angle iron to the bottom of the dresser to act as a guide. It doesn’t have to be the length of the dresser, just enough to always have a bit of the door riding on them. On our dresser, it is placed at midpoint on either side where there is a vertical board to define the sections. When closed, the back end of the door is guided with the metal, and when opened it is the front of the door that is guided.
Door stops
To stop the doors in the center, there is just a small piece of wood, painted the same color as the dress. This stops the rollers and keeps the doors from banging into each other. At the outside ends of the track, the bolt that attaches the iron rail is kept out just enough to stop the door from sliding off the track.
That’s really all there is to it! It’s surprising simple to put together your own barn door hardware diy for any of your farmhouse projects!
Do you love the barn door look? Have a project you’re thinking to try this on? Let us know!


Barn Door Hardware DIY or Buy
Pin it!


Only registered users can comment.