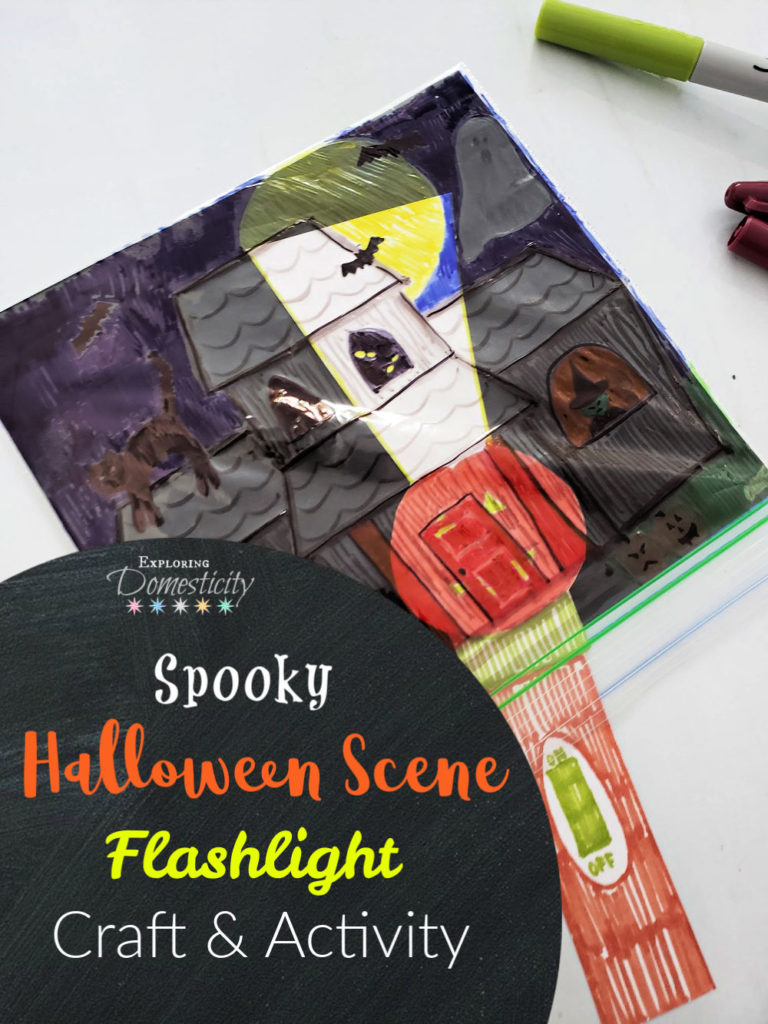
Create a spooky Halloween scene and watch it come to life through the bright flashlight beam. This Halloween Scene Flashlight Craft can be created with things you have at home and is a lot of fun!
Halloween is so much fun! The spooky decorations, costumes, Fall decorations, and cooler temps. It’s all great!
Halloween is a fun excuse to insert a little more fun into your daily life. The BEST way to do this is with activities that are so simple because they involve things you already have. This spooky Halloween Scene Flashlight Craft is perfect for breaking out on the fly and getting into the Halloween Spirit!
Also Read: Halloween Cheese Bats Snack
Flashlight Craft
This idea comes from a video of fun kids crafts that has been floating around. It’s brilliant! They use a plastic bag and draw an underwater scene with a dark background. Then, with a bright white paper flashlight each drawing pops out.
Halloween Flashlight Video!
Perfect Halloween activity!
This Halloween activity is easy to create, involves simple supplies, and kids and adults can make them. Have fun creating a spooky scene and then seeing it come to life with the flashlight beam!
Also Read: Witch Broom Halloween Class Gifts
Spooky and Easy Halloween Scene Flashlight Craft
There are really only three things you need for this easy Halloween craft activity. I’m going to guess you have them all already.
First, you need a plastic bag. I used some basic sandwich bags we have around the house. They work fine and they’re a great size for kids to make more than one spooky scene. However, I would suggest freezer bags because they are a little stiffer for coloring on.
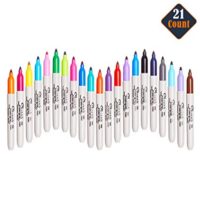
Next, you need some permanent markers. Using something like Sharpies work really nice because they dry quickly and don’t smear. This is the exact set I used and the colors really work well for Halloween.
Last, you need some paper in black and white. Construction paper, card stock, and even computer paper will work. You need a piece of black to fit inside your plastic bag and white to make your flashlight. We always have a set of construction paper in the house for the kids. They rarely come with a true white, so card stock or computer paper will work for creating the flashlight.
Also Read: Personalized Name Pumpkins
Creating the Halloween Scene for your flashlight craft
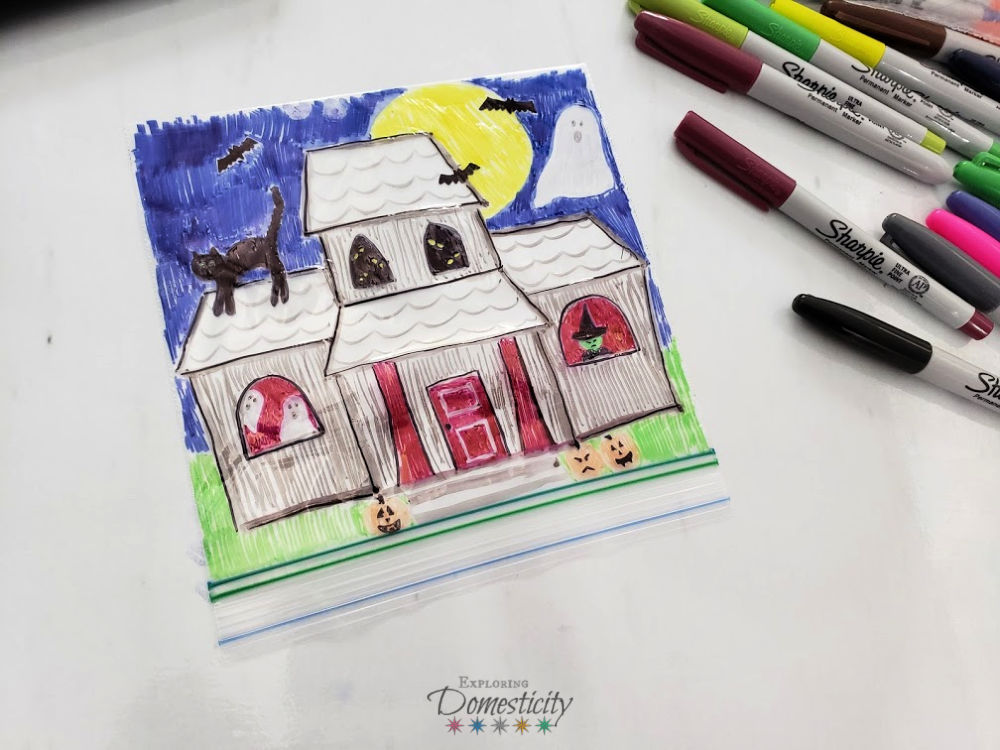
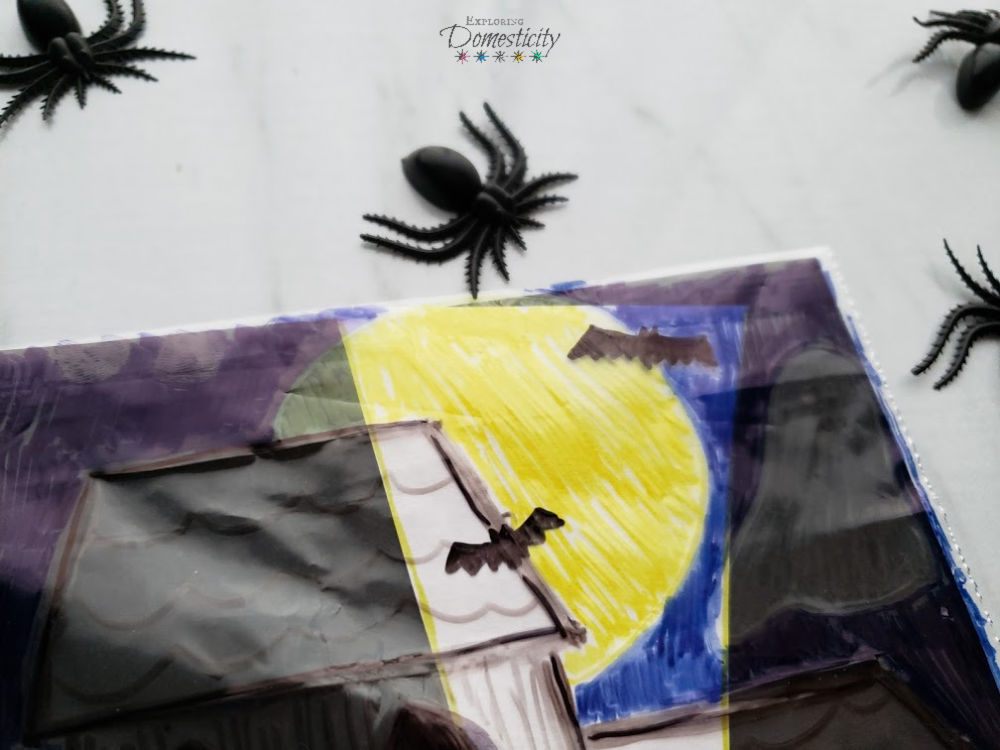
Anything goes for your Halloween spooky scene. Stretch your imagination! You can create an entire scene or random Halloween drawings all over your bag.
If you’re looking to create a Halloween scene, but you’re not feeling very inspired or artistic, it helps to just google “Halloween coloring pages.” Maybe you can find the inspiration for the haunted house bag. You can also easily trace a scene through the clear bag. Anything goes and it’s up to you!
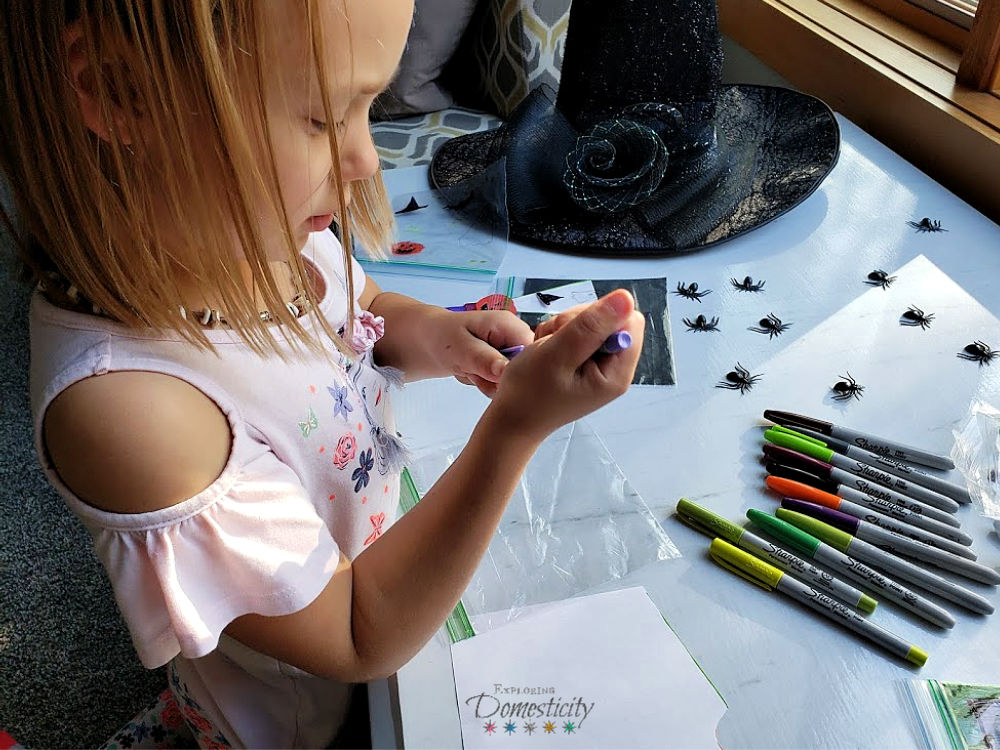
With your permanent markers, start drawing your spooky scene. If you’re not working on a white table, it will help to insert some white paper into the bag so you can see your picture better.
Be careful with handling the bag. If the bag has been touches with greasy hands it will repel the marker. Also, if you aren’t careful and you touch the marker too soon it will smudge.
Making it dark and spooky
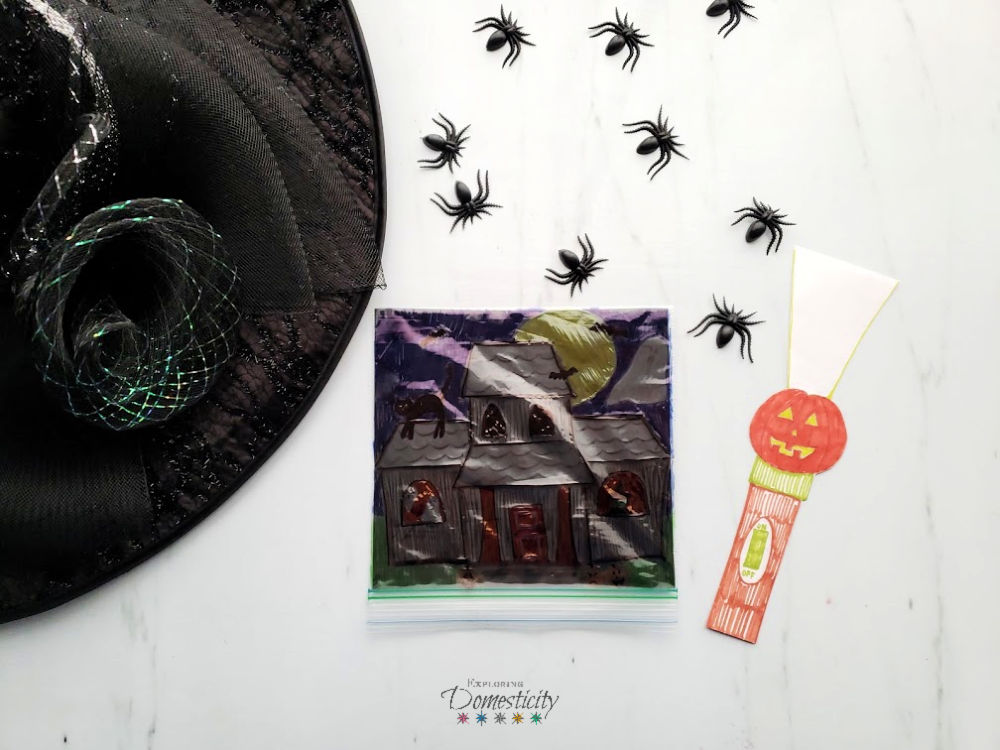
Once you’ve created a scene you like, you need to make it dark and spooky. You do this by inserting a piece of black paper into your plastic bag. Don’t worry too much about getting the perfect size. It helps to cut the black paper a little small for two reasons. One, it’s just easier to get inside. Two, the seal on the bag always has a little smaller opening than the space inside the bag.
Craft the spooky Halloween scene Flashlight
Now you need a flashlight to illuminate all those spooky Halloween scenes.
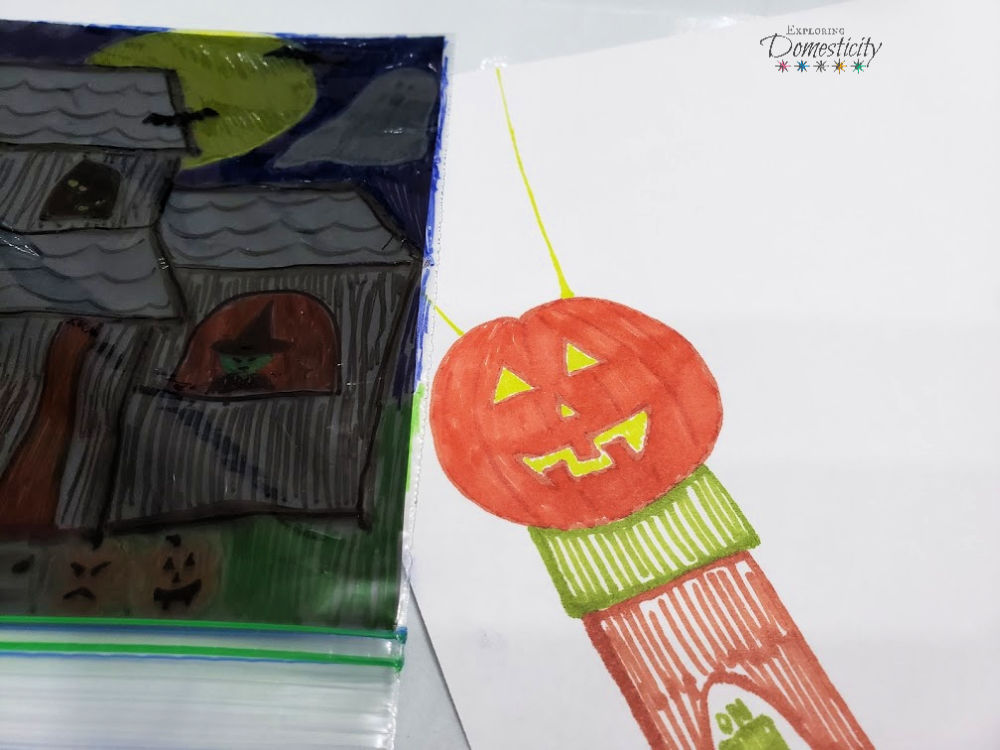
Using white paper or card stock, draw a simple flashlight with a nice, big, triangular beam of light coming off the end. Card stock is nice because it will create a stronger flash light. Using computer paper works just fine as well.
If you’re feeling very crafty, you can create your flashlight out of various pieces of colored paper. Instead of drawing the pumpkin, you can use a piece of orange paper and another color for the handle.
Just make sure the size is large enough to reach the end of your plastic bag. Also, you want it to be wide enough to illuminate a lot of your scene, but small enough that the kids have to move it around.
Also Read: Coco Inspired Sugar Skull Halloween Color-Changing Bracelets
Halloween Parties
This Halloween scene flashlight craft is so perfect for Halloween parties! Whether you’re throwing a party at home, need a play date activity, need an idea for the classroom on Halloween, or just want to keep the kiddos busy this is so easy!
One box of plastic bags, a couple pieces of paper, and some markers and you’re ready! Very easy, and you can have the kids trade bags to explore a new scene and play with them even longer!
Also Read: DIY Halloween Pumpkin Buckets – TMNT and Cinderella’s Carriage
Halloween Scene Flashlight Craft
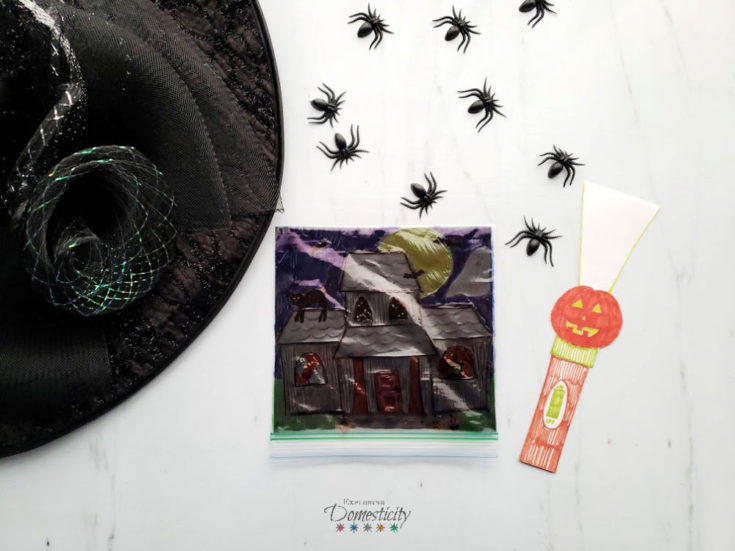
Create a Halloween scene and watch it come to life through the bright flashlight beam! This spooky Halloween Scene Flashlight Craft is easy and fun for all!
Materials
- 1. Plastic bag (freezer bags preferred)
- 2. Black paper
- 3. White paper
- 4. Permanent markers
Instructions
- Gather markers, black paper, white paper, and plastic bag.
- If not working on a light surface, place white paper under the plastic bag.
- Color your Halloween spooky scene on one side of the plastic bag.
- Cut black paper to slightly smaller than the plastic bag and insert inside.
- Create a flashlight with a triangular beam of light on the white paper and cut out.
- Insert the flashlight inside the plastic bag and on top of the black paper.
- Move around to illuminate your scene with the beam of light.
Notes
* With the black paper inside, you can create another spooky scene on the back side of your plastic bag.
** Be careful not to touch your drawing or your bag to much to avoid smearing the marker. Permanent marker dries the quickest which is why it's recommended.
Recommended Products
As an Amazon Associate and member of other affiliate programs, I earn from qualifying purchases.


All you need for your Halloween Scene Flashlight Craft


Only registered users can comment.